
Babalouie
-
Posts
84 -
Joined
-
Last visited
-
Days Won
14
Content Type
Profiles
Forums
Events
Gallery
News & Articles
Videos
Posts posted by Babalouie
-
-
Did it take long to replace it?
-
FYI, I had used this product a few years ago to bring back a steering wheel: http://www.performanceforums.com/forums/showthread.php?67303059-Leather-Recolouring-or-Restoration-kits
-
 1
1
-
-
Matthew, did they mix up the colour for you, or do they have Alpine White off the shelf?
-
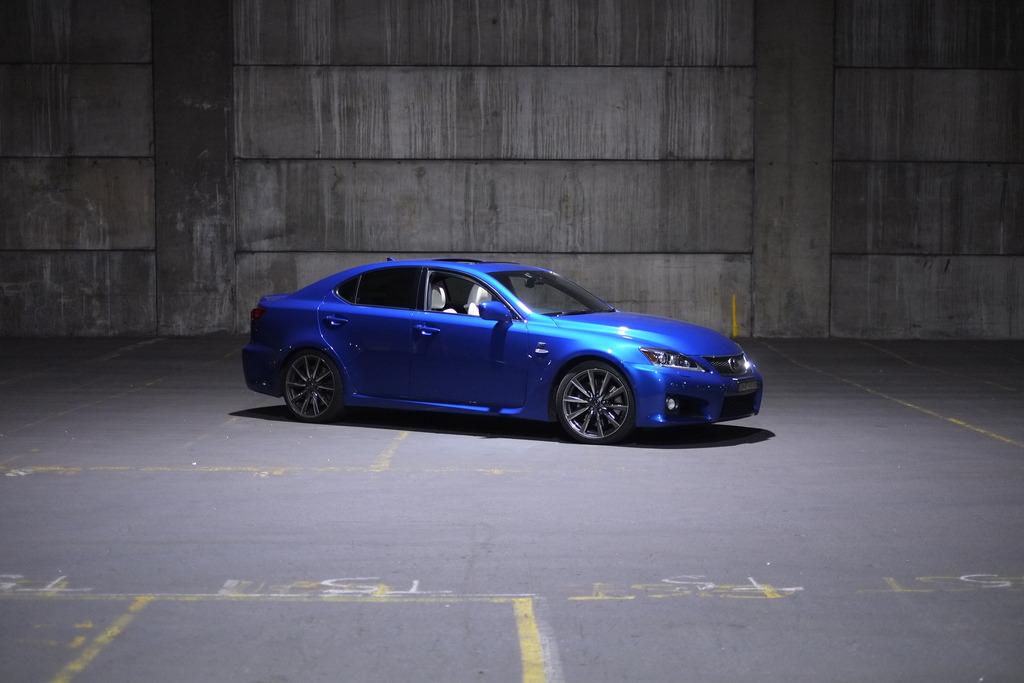
The latest addition to the ISF are some new shoes.
With an upcoming drive day with the Lexus F owners club, and a trackday, the old Michelin Pilot Super Sports didn't look like they'd survive too many laps of the track, so I decided to get a set of my favourite tyres; Advan Neova AD08R. The stock size is 225/40-19 and 255/35-19 which is strangely undertyred for what was Lexus' headline performance vehicle at the time. My wife's bone stock IS250 comes with 225/255 tyres as well, and the tyre footprint is somewhat less than what was available on the M3 and C63 of the same vintage. Even the later RCF and GSF came with bigger rubber at 255/275.
The stock 8in and 9in wheels can take wider rubber, so I decided to go for the common upgrade to 245/35 and 275/30, which bulge out the sidewalls noticeably compared to the stock tyres which have more of a stretched sidewall look.

And how does it feel? It does seem to have more grip compared to the (2014-datecoded) old Michelins, and there is definitely more traction with the wider rear hoops, it's no longer breaking traction on a 1-2 upshift. But also noticeable is a change in the steering feel, which seems to have lost a little of the old alertness on the first 1/8th turn of the wheel. I guess it's the softer sidewalls of the new tyres, compared to the stretched-taut sidewalls of the old tyres. And it does seem to ride a bit softer too, notwithstanding that the Advans have very stiff sidewalls for motorsport use.
So with the new tyres still feeling very green, we went along to the excellent drive day put on by the ISF/RCF/GSF Club Australia, which took us down the south coast for a nice lunch. V8 sounds and eye candy as far as the eye could see :)
And today we headed to the track!
Apart from the new tyres, since the last trackday the brake pads have been upgraded to Endless MX72 Plus. At the last trackday I'd fitted a brand new set of Brembo pads, but they wore to almost nothing before the end of the day. I'd used these before in my old RX-7 and they were a good road/track compromise, with little noise and dust.
At the last trackday, I'd found that I was a half second quicker with the traction control set to Sport. The Michelins weren't very consistent and it was too easy to overheat them with just a slide or two, so keeping the traction on seemed to keep the car straighter and there was just the right amount of power being doled out, allowing little powerslides without overwhelming the rubber. So I started the day the same way, with traction on in Sport, and the new Advans were definitely much more consistent. The old Michelins felt like they had a narrow sweet spot before they overheated, so you had to pick your battles with the traffic on the track, as to when you were going to go for a good lap. In comparison, the new tyres seem to be at their peak for lap after lap, and so it wasn't long before we'd done a slew of laps that were slightly under the previous best time of 1'10.21.
But a couple of tenths better was all she'd do. It did feel different this time 'round...the traction control didn't seem as intune with the tyres as it was before, and instead of gentle power-on slides, it now felt like the traction control was pulling the plug a little abruptly and costing us precious time accelerating out of corners. I suppose it's possible that the grippier new tyres might unload the inside tyres more, causing the traction control to come on more aggressively.
So I decided to try a session with all driving aids off, and surprisingly it was much better. On the Michelins, it would transition to power oversteer a little messily, but on the Advans it's much, much more predictable; it was easy to hold a slight powerslide on the throttle and driving a little sideways doesn't feel like it's costing time. Straight away, the laptimes dipped below 1'10, we did a bunch of laps at 1'09.7-9 and eventually the day's best was 1'09.68.
And here's the in-car of the best lap.
There's still a little fine tuning I'd like to do...the car feels a little nose heavy, and notwithstanding the wider front rubber, is a little reluctant to rotate on corner entry. It's very stable on entry, so it's hard to mess up a lap by backing into the turn too much, but a little more front end bite on the way in would be nice. On the flipside, the balance on the power after the apex is just fine and dandy, so I'm a bit loathe to want to change tyre sizes.
As for the brakes, the new Endless MX72 Plus held up their end of the bargain and together with the Advans, you could do 5 or 6 laps within a tenth of your best before the car started to lose consistency. Where before, you had to save the brakes and tyres for a nice gap in the traffic and then go for it for one big lap; now the ISF seems to be able to stay at its peak for much longer. Overall, the ISF is a little quicker than my old FD RX-7, which was a few tenths behind at 1'09.94. Needless to say the FD is far more nimble and gets its laptime from finesse rather than brute force. But the ISF has got heaps of brute force, so it's a little quicker, but a tiny bit less entry understeer would make it more entertaining.
I'm a little disappointed that the fancy new rubber is only a half second faster than the crusty old tyres, but it's nice to end a trackday because you ran out of fuel, compared to running out of brakes or tyres :) A full tank disappeared in 55 laps :)
-
I fitted similar-style mounts to my 911 years ago (they were a factory RS upgrade). The ISF stock mount is also similar to the 911 stock mount, in that it's more like a squat little shock absorber than a rubber hockey puck.
Result was a more immediate feeling to the throttle, and a more...confident...feeling in the corners, as if the stock engine mounts allowed the engine to sway a bit under g-forces. Downside was more interior noise, in the form of whirrs, whines and diff noise...which the stock mounts are meant to isolate.
-
I see...
-
I feel for ya...the pics of the bodgy film look terrible.
So they applied the coating onto the paint, and THEN they put the film over the top?
-
It's been 2 weeks since the Gyeon Mohs paint coating was applied, so it should have bonded to the paint and be safe to wash the car now. And you can see the water-repelling properties.
https://youtu.be/KgildifXqSUIt does also mean that dirt is less likely to stick, and everything just glides off when you wash the car.
But another detailing episode which was less successful, were the seats. They were in good shape when I obtained the car, but I think I might have scrubbed the leather a little too enthusiastically when cleaning, plus a year's worth of wear and tear meant that there was a spot on the lower cushion where the colour had rubbed off. The dark-coloured leather beneath was now showing, and it's super-obvious given that the rest of the seat is a lovely sparkly white.
The wear is exacerbated by the seat foam not being as plump as it used to be: this means that the leather folds and creases when you sit on it, which wears out the colour in the high spots. This is in contrast to the passenger seat, where the leather seems to be pulled a lot more tautly. Of course, white leather doesn't come from white cows, and automotive leather is hot-rolled with a polyurethane paint to give it colour and an even grain. So it's all totally artificial but very uniform...however it means that when the surface wears, it's like a paint layer rubbing off, which doesn't have the distinguished aged-leather appearance that old cars might have.
My trimmer suggested this guy: https://newliferepairs.com.au/technicians/north-western-suburbs-greg-helmore/ He sands back the leather in the spot that needs to be repaired, then has this three-step dye process where he mixes up the colour to match and sprays it onto the seat.
And it came out...rather well. We'll see how durable this new colour is, but initial impressions are that he did a great job.
The close-up pic makes the repaired section look more creamy and offwhite, but I think that's just the result of different lighting when I took the pic. Overall the colour match is spot on.
Another little mod I picked up recently was this:
It's a JoeZ intake elbow, that replaces the stock plastic one.
Now, I don't think that there's anything terribly wrong with the stock plastic piece; the JoeZ item is slightly larger in internal diameter, and would flow a tiny bit better because it doesn't have the concertina-bit like the stock one. Apart from that, there are no other changes and the stock airbox and filter element is untouched.
It's claimed that the new pipe adds 4.6rwhp, which is dangerously close to a seat-of-the-pants rounding error, but the main benefit I was after was a louder sound. When stock, an ISF has a really lovely induction snarl when it goes past 4000rpm, but it's all calibrated to the usual tomb-like quietness of the cabin when stock. The moment you add a noisemaker mod like an exhaust, the induction bark gets drowned out. So it's said on the Lexus forums that the JoeZ pipe restores some of the induction noise to offset a louder exhaust, and I'm all for that.
And...yes I suppose it does make the intake noise louder. As for that 4.6hp...I think that anything I might be able to feel, is probably the placebo effect of having just installed a shiny new mod, and/or is the result of the car sounding a bit more dramatic above 4000rpm. But, it wasn't expensive, and took all of 5mins to install, so it's all good.
-
Double demerits and a long weekend seemed like a good idea to finally do something I'd been putting off since I bought the car, which is to apply the Gyeon Mohs paint coating. I'd done a paint correction on the car when I first got it, but as the Gyeon process takes 3 days (during which you can't move the car), at the time I was too busy driving it to bother. But it's high time I got off my arse to do it.
Stage 1 is to give the car a good wash.
And after rinsing the car, while it's still wet I clay it down to remove surface contaminants. I don't park it outside much, so it was still reasonably clean from last year's detail, and the claybar didn't pick up all that much.
Once the car's dried, I can start on the polishing. And the first stage is the heavy cut.
Only put a small amount on the coarse cutting pad (a little like a towel material)...this is enough to do a whole fender.
Dab the pad (with the polisher turned off) to distribute the polish around the panel.
And then whizz it lightly around on the lowest speed setting, to spread the product in an even haze all over.
Once you have good coverage, turn the polisher speed up to max, and slowly move it around the panel in a criss-cross pattern. The polish should almost buff until it's clear, which means that the abrasives are broken down to a fine powder and have done what they need to do. Then buff with a cloth.
At this point, it's pretty good. Any swirls are gone and the paint looks nice and deep. In a few spots where I noticed a bit of a scratch, I'd give it a few more goes with the heavy cut to make the scratch less noticeable. But it still has more to give.
Next step is the medium cut, which is applied with a foam polishing pad. There's a bit of crusty old polish on the pad from when I did the Hako last, but it all comes off with a stiff brush.
Same process to apply as before, and it noticeably does add more gloss.
But to get that mile-deep look like the paint is still wet, there is one more polishing step to add that last bit of gloss. This is the fine cut polish, which is applied with a finishing pad, which had smaller holes in the foam than the one I used for the medium cut, and feels smoother to the touch.
Again...same process to apply as described above, and it does seem to have knocked the rougher edges off the paint, and it's now quite reflective.
Now that the paint correction is done, we can start to apply the Mohs coating. Before we do that, the whole car needs to be sprayed with this stuff. It's like an alcohol, but a bit stronger and it's to remove the oils and lubricants leftover from the polishing stage. This allows the coating to bond better to the paint.
It's applied very generously to the car, and then carefully wiped off.
There are no more steps before we apply the coating, so it's important to use a new (or at least freshly washed) cloth to wipe it off, as you can't leave any dirty streaks. Do a very small section at a time, so that it doesn't get a chance to fully evaporate and leave a streak.
The Gyeon Mohs kit consists of a small glass bottle of the Mohs solution, a foam block, some bits of sueded cloth, and a spraybottle of Q2 Cure (more of which anon)
You start by wrapping one of the cloths around the foam block, and dribbling on about 12 drops of the Mohs solution in a line.
It goes on like a greasy film, so it's easy to notice if you missed a spot. Just the same, you do a criss-cross pattern to get it nice and even. In the summer heat, it flashes off quite quickly, so I do a small patch at a time (eg half a door or 1/6th of the bonnet), wait 15 seconds and then buff to remove.
As with the alcohol-wipe stage, it's super important not to leave any streaks so I use a new cloth and keep checking the paint reflection in case I missed a spot. Any streaks will dry that way.
Then you have to walk away and let it sit for 12hrs, before applying the Q2 Cure. It's like a detailer-spray that's meant to be applied every now and then to give the coating some protection and to top it up.
Spray it sparingly on a cloth, and wipe it across all the panels, one small section at a time. It can leave milky streaks so as before; wiper on and then use a freshly washed cloth to buff and pick it all up.
And then you leave it alone for another 12-24hrs before you can move the car, to allow the whole shebang to cure. Apparently it doesn't fully cure for 2-3 weeks, so the instructions warn you not to wash the car for at least a week. So I think keeping the car dry is probably not a bad idea.
The coating is meant to be a hard sealant to protect the paint correction work done underneath, but it also adds a fair bit of reflectiveness.
It's meant to last 12mths and is hydrophobic, so rather oddly driving in the rain seems to make the car cleaner. Its water-repellant properties also seem to make dirt less likely to stick, and it's a lot easier to wash and keep clean. I ran a water hose over one of the suede cloths I used to apply the coating, and yeah it seems water repellant; you can run a hose over it, and the water all runs off and the cloth comes out dry.
Pretty happy with how it turned out.
-
 3
3
-
-
On 1/18/2018 at 4:55 PM, OzzyISF said:
Hey mate , I put them on my car also ns400s mine squeal pretty bad on slowing down . Did you re use the shims or take them off. Cheers
I have the NS400 on my wife's car and there's no squeal. When you fitted them, did you do a break-in? Sometimes when you fit green new pads without a break-in, they'll be noisy.
FYI, find a quiet street and do about 15 medium-strength (enough to dip the nose) stops from 70km/h. Try not to stop, and just accelerate up to 70 again when you've slowed to a walking pace. Rinse and repeat until you get up to 15 stops, then cruise around and let the airflow cool the brakes. This will heat up the pads and leech out the resins etc that are leftover from manufacturing, and it also lays down a thin layer of brake pad material on the disc surface.
It's not too late to try this if it's still squealing.
-
They look nice...was the landed cost pricey?
-
With the VLine...can you say, watch Youtube on the main screen? Or is it just for music and nav?
-
I'd imagine that the cat would have to be in the first part of the exhaust itself (ie after the header). Since aftermarket exhausts generally delete the secondary cat, you would have to get this done at an exhuast shop?
-
Average for me is 14.5. Mainly city driving, but I avoid rush hr, so it's probably a bit better than most who are stuck in a peak hr commute.
-
At the rear, just put the cup of the jack under the diff.
-
I had Aragosta on my RX-7. Such nice shocks. Double the stock spring rate, but a better more comfortable ride than stock. They're actually made in the Netherlands by the same mob that makes Moton racing shocks, so they have a ton of pedigree and are beautifully made.
I'd love to have a set for the ISF but the ISF offerings start close to the top of the range at Type-S and they're $3800 before shipping. Ppl like jessestreeter.com.au usually get trade price and so I wouldn't be surprised if he can sort it out so that the landed cost is $3800, but it is a more expensive option than Kw V3.
-
On 8/2/2017 at 0:50 PM, 2bling said:
Great stuff did you end up getting endless mx72 pads if so how much and were from. And the Advan tyres very expensive, what are the MX72 (on the Mazda) like for road and track cheers.
"MX72 Plus" were about $700 delivered from jessestreeter.com for ISF. They're a good compromise pad; lots and lots of staying power on the track and for street they don't squeal, don't feel "cold" like competition pads often can, and are much lower dust than the stock pads. They're designed for the weekend track warrior that's also dailied during the week.
The only downside is price.
-
1
-
-
Too late :) MX72s are here :)
Oem Brembo pads are fine for say 5 hard laps at a time, but the issue is that Wakefield public practice days can be quite crowded with 15+ cars on the track per session. So as a result you encounter a lot of traffic, and so might get only 1 or 2 clear laps in a session...and they tend to be at the end of a session when the brakes are pretty temp'd up, and you need to have a bit more in reserve. I had the same issue with FD, and only after upgrading to MX72s did I have good brakes and a clear lap at the same time :)
I'd imagine EC is so much bigger that the field spreads out a lot more.
-
They changed the pair in my case
-
It should be covered under warranty. I've had Lexus replace shocks at about 20k when they were faulty before, but in that case the shocks had a visible oil leak
-
Find a road where the suspension clunking noise can usually be heard.
Drive along it, with your foot touching the brakes a little. Does the noise go away?
-
MX72 are good pads, you'll be very happy with them :)
-
On 6/30/2017 at 10:19 AM, 18ADF said:
I love a lot of the figs products, with these I just think rr design would have more resistance over the more solid design of figs. Also has me wondering what the longetivity would be like on the bearing and whether it would require maintenance/replacement over time.
It depends entirely on the quality of the bearing used. I've had suspension pillowball bearings wear out in 8000kms, and I've had them last 40,000kms and are still going strong...I have had more luck with japanese bearings than USA ones (even name-branded ones).
-
FWIW I went all the way down to 0km remaining, and managed to get from Wakefield Park to the nearest petrol station in Goulburn, which was 15km away.
In theory using the last of the fuel in the tank could suck up some crud, but I've never seen any crud in a petrol tank that was worth worrying about. Unless the car in question was sitting for many years and the inside of the tank actually went rusty


My IS-F story so far....
in Lexus IS-F Club
Posted
Great job on the detailing :)