
Babalouie
-
Posts
84 -
Joined
-
Last visited
-
Days Won
14
Content Type
Profiles
Forums
Events
Gallery
News & Articles
Videos
Everything posted by Babalouie
-
The SuperPro kit is a great option, and will be heaps cheaper than the American alternatives! You will need a press to DIY it, but any good suspension shop will be able to do it...and it'll just be 15mins labour more than fitting up the ready-made RR unit. Or...you could DIY it and take the old bushing housing and SuperPro bits to a pro to have them pressed in...they'll probably only charge you $25 and then you bring it home and refit :)
-
I reckon a 3rd option is the FIGS item with the poly bush: http://shopfigs.com/v3/by-vehicle/IS/CAT-LEXUS-2IS-3GS-ISF/G2ISHP-FRLCA-SP3491K-IN-BRKT I like the conical bush on it, it should be more refined than the RR while still providing the same side to side stiffness
-
I had a lot of fun with the ISF at its first trackday. Bottom line: the ISF got down to 1'10.2, which is only a wee bit slower than the FD was at 1'09.9. And I have to remember that the FD was on really good Endless MX72 pads and Advan AD08R tyres at the time, so it isn't really comparing like with like. At the FD's very first trackday, it got down to 1'10.2 as well; but that was on Kumho KU36 tyres, which are many magnitudes better than the ISF's Michelin rubber on a racetrack. So I reckon the ISF is good for a high 9 on road tyres and quite possibly a low 8 with proper tyres and brake pads. My fastest laps were with the driving aids in Sport Mode, which is to say that the traction control is slackened off and allows a little sliding. When I turned it all off, which I only did for one session; I was about a half second slower. But it's interesting to compare the lap traces against the FD's best lap of 1'09 (the FD is the red line): Starting from the left, the ISF is 10km/h up on the FD's top speed, with the ISF clocking 186km/h before braking. The lines then dive under brakes...ISF's braking point is a little bit earlier, but the big Brembos allow better modulation than the FD's brakes, so you can see that I'm bleeding off the brakes a bit better and getting a slightly better corner entry speed. As the line rises again for the run up the hill, it's roughly line ball, but as the line goes down again for Turn 3-5, you can see that the ISF's trace is jagged, as it has to slow more for the corners, and then accelerate out. In comparison, the FD can take that whole section at a more constant speed, hence the red line is smoother as it heads to the second deep braking point. Then the line rises again, for teh run down the hill into the right hand sweeper, and you can see the FD's red line smoothly arc upwards, because the FD can turn into the sweeper with just a brief lift. The ISF needs a longer lift to settle the car, and so you can see the trace dip a little halfway up as the line climbs. Then it's hard on the brakes at the "1.21" point on the chart, which is the Bus Stop hairpin. The FD gets a higher entry speed, while the ISF brakes to a slower entry speed, but then you can see the ISF's brute force as it outaccelerates the FD up to the right hand sweeper on the back straight. As the line climbs to the final peak of the lap, again you can see the traces for both cars dip, as they back off to turn in for the sweeper, but there is a bigger dip for the ISF which needs a touch of brake, whereas the FD makes do with just a lift, with the FD recording a higher mid corner speed. Then finally the lines dive for the last time as the two cars brake for the final hairpin, with...surprisingly the ISF logging a higher mid corner speed...probably due to the slow point and squirt nature of the corner handing the advantage to the ISF, which gets a much better acceleration out from the apex. So overall the analysis isn't a huge shock; the light and nimble, good-tyre shod FD gets a small advantage in midcorner speed in the long corners, but it has a huge advantage in the series of tight corners (which is where it gains most of its advantage). The ISF wins the race out of the corners, but needs to slow more for the entry, and the tighter the corner, the more it sees the FD motor away into the distance. But given that the tyres and brake pads of the ISF are nothing special, I'm a little shocked it's as fast as it is. The tyres are Michelin Pilot Super Sports, 225 at the front and 255 at the back. Exactly the same footprint as the FD, but the Michelins fade quickly on the track and it's hard to coincide the sweet spot of the tyres, with a clean lap with no traffic. I'll upgrade to Advan AD08R when the time comes, and I'll upsize them to 245/275 which fits fine on the stock ISF rims, and should make a huge difference. The ISF brakes were the oem brembo pads I fitted a couple of days before the trackday. They were really good for the first two sessions, with huge, beastly retardation but after that they got a bit overtemped and began to wear out really fast. After 42 laps, the brand new pads got down to 2mm of pad material, and you could even see them getting thinner and thinner with each session :) The brembos are now in the bin, I'll do it right and get Endless MX72. It's a shame, the Brembos had great feel under road conditions. ...and here's where all the brake pads went :) And here's the vid! What's it like to drive? Well, first thing is that there's plenty of accessible power, and the 8spd snaps off aggressive shifts making the whole package feel pretty mighty. In a couple of corners where 2nd and 3rd were both useable, 3rd felt quicker, with enough low down torque to dig the car out of the turn...the top end power can be a bit spiky as it comes in and kicks the tail out, so going a gear higher felt like the better compromise. In terms of balance, it's great...very resistant to understeer, and power oversteer on corner exit is the dominant characteristic. It actually feels like it has more power than it can use, and you have to be quite progressive with feeding it in. And for a big ol' gal, it always hung in gamely and never felt like it would collapse into understeer, and it sure felt nimbler than its 1680kg would suggest, and it sure doesn't feel like a sedan. As for the driving aids, I was a bit slower with them all off, and only ran it this way for one session. There isn't the same feedback as the FD, and rather than ease into a slide smoothly, the ISF tends to transition into oversteer in a bit of a messy spill. So with everything turned off, it could be hard to walk the fine line between sliding just enough, and going way too far with a smoky drift; it was hard to find the middle ground, but maybe I just need more practice. Certainly the traction control is really well judged for track use, it would allow a little power oversteer, and keep the power on for a good drive out of the corners. And you could even feel it straightening up the car, when I'd over-rotated it a little on the ripple strips mid corners. Pretty clever system, I think I'll need a lot more practice before I can better it. Proper brakes and rubber will transform this, I reckon. I'm having a lot of fun with this, this is a damn fine car :)
-
Hi everyone What's the go for posting vids in a thread? The usual forum code [youtube] [/youtube] doesn't seem to work.
-
The Toyota IS500 got a bit of love on the weekend For...this! An X-Force dual exhaust, supplied at a very reasonable price by sparesbox.com.au So the first step is to remove the old system... First to be removed is the axleback section, and that starts with dousing all the rubber hangers with spray lubricant. They don't come out easy, as the "mushroom" on the end of the hangers is pretty big. It was easier to remove the hangers from the bodyside as a result. These are the hangers next to the diff. The hangers for the twin mufflers are much harder as you don't have access to spray the front with lube, and there isn't room to get a prybar in there. But I figured if I let the axleback section hang down... ...I can get my hand above the muffler to undo the three bolts that attach the muffler hangers to the chassis. Ever wondered why Lexus are usually pretty heavy? Well it's because they do things like make chunky muffler brackets that are held on by three massive M10 bolts. I'm not sure why they need to be so overbuilt, you could probably support the weight of the whole car from one of them. Axleback section out...you have the space and time to prise out the rubber hangers from next to the diff. The stock mufflers look massive and are heavy, but the choke point of the whole system is probably this squashed oval section that goes under the diff. Next step is to remove the centre section. The trans tunnel has two braces; one is easy to unbolt, but the other has bolts which are behind the plastic undertray But if you undo a few plastic scrivets, you can prise down the undertray enough to reach the bolts easily enough. Then you remove the two O2 sensors. The ISF actually has four; the other two are on the headers. For this, you'll need a Toyota/Lexus O2 sensor removal tool, which I bought off eBay for $80. Because the O2 sensor has a tubular shield around it, you can't get a spanner onto the hex. And a conventional O2 sensor tool is probably too long. And with the O2 sensors out, the centre section can be removed from the car, by supporting the back on a jack, while you unbolt it from the headers. The X-Force is a dual system, with one 2.5in pipe per bank, that merge together in an X. The stock pipes actually start out as also 2.5ins, but they merge into a central resonator, then into that squashed oval bit, before finishing in 2.2in pipes to the mufflers. Now, as to why you need the pipes to meet in an X...I think the Engine Masters boys do a much better job of explaining it than I could :) https://youtu.be/fCio5K0WfHU So the X-Force should be less restrictive on pipe size, but the new exhaust is catless, so the secondary cats are eliminated. This should remove quite a lot of restriction. The car itself still has two cats inside the headers though. And here you see that the headers don't use a conventional gasket; instead there's a crushable ring. The stock exhaust has a recess for the crushring... But the flange on the X-Force does not...I fitted a new oem crushring, and when you tighten it all up, the flanges don't actually meet when the ring is fully crushed. It doesn't leak, so I figure this is how it's meant to be. Fitting up the new exhaust is much quicker then removing the old one. I'd say the whole job took three hours, and 70% of it was getting the old one off. On a quality note...the X-Force system is VERY reasonably priced, and is half or a third of the price of alternatives from the USA (PPE, Borla) or Japan (HKS, ISS Forged). But there are some corners cut for the price. Firstly the gaskets are very flimsy, but given the weird hole to boltspacing ratio, I couldn't find alternatives. So they went on with a lick of Permatex Ultra Copper sealant. This was a little frustrating...whoever welded the resonators together, didn't remove the plastic wrap first. Now the resonators are pressed together and there is no option but to let nature take its course and melt the plastic once we fire her up. There's also lots of nasty paper stickers which take forever to remove. It fits and doesn't leak...but you won't be lying under the car admiring the welding porn. But...refit the O2 sensors, after giving them a couple of twists anti-clockwise (so that the wires are straight when it's done up). And we are done! The only fitment issues to note were very minor: one pipe fouled the diff mount...but when the muffler was bolted up, it pulled the pipe away from it and there's adequate clearance now. Another was that one of the hangers fouled the aero undertray that bridged the floorpan gap where the driveshafts are. But I made a little hole in it, and now they can co-exist. But apart from those minor issues, the X-Force is a decent product, especially for the price. Unusually, it comes in several short sections (7 in total) instead of one big piece like most aftermarket system do; but I suppose this makes it more feasible to ship, and it also makes installation a bit easier as you're not lifting a huge, heavy section in one go. Being able to bolt up the sections one by one, also makes it more forgiving when it comes to fitment, as you have a little bit of wriggle room where each section bolts up. And oh...a bit of a lifehack...you can use a jacking puck for a Porsche 964. That generation of 911 had sill jacking points which were metal holes in the side skirt. There is no way that you can get a trolley jack under there without ruining the side skirt, so you can buy this padded metal puck that fits into a hole in the jacking point. ...and I fits perfectly into a handy-dandy hole in the middle of the crossmember. And the rubber padding means that the jack cup doesn't leave scratches on the crossmember too. Last thing before she comes off the stands, is to fit a new set of pads to the front. We'd fitted new Brembo pads and DBA rotors at the back a few weeks ago, but the front discs were pretty new at 29.5mm thickness (new is 30mm, worn is 28) and the pads were an unknown quantity. With the prospect of trackdays looming, I felt that brembo pads all round was a good idea. To remove the old pads, it's exactly like the rears, and you use a hammer and punch to tap out the pad locating pins Then unbolt this doohickey...which I think isn't for the purposes of retaining the pads in place, I reckon it's more to act as a strut brace for the very long calipers and to give some strength to the unsupported middle of the caliper. I have no idea what the old pads were...they're green but don't look like Project Mu green. By the way, the Brembo pads were sourced from https://www.brakesdirect.com.au/ at the shockingly reasonable price of $69. I think Lexus charges $600, so this is a massive saving. The pads are actually listed for AMG CLK63 but seem to fit just fine. FD3s front brake pad for scale. And with that...we test! Overall the car does feel more sprightly, and the sound of the new exhaust seems to be a good compromise. It's burbly at idle, but mostly disappears if the windows and sunroof are closed. The only downside seems to be that the great induction snarl is a little drowned out now. The stock exhaust is so silent that the induction is all you normally hear when the airbox flap opens at 3800rpm...but the exhaust overwhelms it now. But in return, there are all sorts of nice muscle car noises from idle to 4000rpm, so it's swings and roundabouts. Very importantly, it doesn't drone at freeway speeds and there is just a distant woofle...there is a little budda-budda-budda backbeat under load from 1500-2000rpm which is a little intrusive, but I'm thinking that as the system packs out with carbon from use, it might quieten down.
-
Thanks for the welcome! ...as for brakes, nowadays I find that the best compromise is to run low-dust pads for street use, and for that one trackday a year I get to do, I fit harder pads beforehand. The Brembo pads already look pretty dusty, so I reckon I'll order a set of PMu NS400 all round, which should keep the dust at bay between weekly washes. They're only rated to 400C, so will turn to butter on a track, but the Brembos are cheap as chips ($99) so I'll keep a set of those for track days. Over the years, I haven't found a pad that does both jobs effectively. The closest were Endless MX72, better on dust than the Brembos and oem pads, but certainly not zero dust. Oh and an XForce exhaust has already been ordered, ETA next week :)
-
Holy smokes, this thing is fast. (Many thanks to my good friend Reggie for these epic pics) It's been a month and a bit of ownership, and I did spend the first few weeks being a little intimidated of the car. It seemed to light up the traction control indicator all the time, and when shifting in manual mode, it would change gears with such violence that it would often bark the tyres, and in one notable occasion; spit the tail sideways with sufficient force, that a half turn of opposite lock was required to get it back. It felt heavy and a little wooden, and alternated between feeling like it didn't have enough grip at either end. Looking at the tyres, they *look* big at 19inches, but the actual footprint of 225/255 is actually exactly the same as my wife's bog standard IS250...which notably doesn't have a heavy V8 hanging over the front axle. But the funny thing was; when you got it on a winding road and you were driving properly, then it became a pussycat. Ie, when you're braking into corners and accelerating past the apex, it settled down a lot and the feedback started to really flow through. The traction control could be left totally off without fear and it's especially fast and really rock solid in the 3rd gear and upwards corners. In the tight and nadgety stuff it does feel big, but it still gets stuck into it and I think it's mainly a confidence issue on my behalf, because I'm used to much smaller and lighter cars. So yes, having lots of fun with this and it's got a lot of personality. But one driving issue I had, was dealing with the manual mode shift, which is set the wrong way, requiring a push-forward to change up. Sure, on a winding road it's more natural to keep your hands at 9 and 3, and use the paddles...but if you have a bit of oppy lock on, it seems more natural to reach for the stick rather than wait for the wheel to straighten and then pull the paddle. And without fail...I'd instinctively pull back for an upchange, which is probably as a result of way too many decades playing video games. A DIY solution to swap the gearshift around exists though, and the first step is to remove the side pieces on the centre console trim. You very gently prise the back part upwards... ...and work towards the front. The clips are oriented such that you pull the trim off diagonally backwards. Then you spin off the gearknob, and pop off the centre console trim Unplug the 2 wires for the seat heater and the light for the PRNDL plate, and the centre console trim can be set aside. If you have coffee stains or what have you, that you can't clean off on that plastic plate under the gearlever wigglegate, now is the time to slide it off and give it a good going-over with the plastic dressing of your choice. To get a bit more room to work; remove 2 screws and the ashtray will come off. The wiring connector we need to hack, is that one right there, at the front of the gearshift assembly. Once you unplug the connector, you can see pink and light purple wires at the top...they need to be swapped around. First, you prise this pin lock bar upwards. The wiring pins have these tabs that stick up, and when this pin lock bar is clicked-down in place, the pins are locked in position. So you need to scooch this up by a few mm to unlock it. And now you can juuust about see in this pic...that the metal wiring pins are held in by these plastic locking tabs. What you can't see, is that each tab has a handy little ledge that sticks out. To release them, you get the smallest, 1mm wide screwdriver from your tiny-screwdriver set, and prise the ledge upwards, and this will allow the wiring pin to be wiggled out the back of the connector. And if you're like me...then you'll easily get the first pin out, and then in your impatience, you'll mangle the little ledge on the second pin's locking tab..mangle it to the point where that it ain't gonna come out for no man. ...and that's when retail therapy comes to the rescue. TOM'S Racing has a product which reverses the shift pattern, and after a little paypal action, the EMS Fairy delivers a box to your door. What a time to be alive. It's not really rocket science (and I think I won't be applying those stickers) It's just a male and female version of the stock wiring connectors and if you look closely, you can see that the red and brown wires swap over. Same result as the cheapass DIY version we were trying to do. It just plugs in between the stock plug and the gearshifter and that's it. While I was at it, I also got the splendidly named TOM'S Super Ram II Street High Performance Air Filter It looks to be the same as the R-Magic branded filter I have in the FD, which is made by Pipercross and is a washable dry-foam which needs no oil. In the FD, I reckon it does make it a tiny bit crisper on the throttle, but given that's an oldschool turbo and the ISF is normally aspirated, I doubt there'll be any discernible difference. First we pop off the engine cover to reveal the mess that was hiding underneath. The valve cover breather tubes are held in with spring clips, which have these ears sticking out, and you can just compress them with your fingers and wiggle the hoses off the intake pipe. Then the L-shaped intake pipe between the airbox and throttle body can come off.. Then you undo these clips on the airbox and slide the cover back to swap the fliter elements. The old Toyota-branded one wasn't too dirty. A popular stage-1 mod is to replace the intake pipe with an aftermarket one, which frees up a small handful of hp. BTW that protruding box is like an echo chamber, to amplify the induction noise. But there's just a little hole that leads to the chamber, and the inside of the intake pipe is relatively smooth. So I think I'll be sticking with the stock piece for the sake of the noise; it doesn't look like it impedes the airflow all that much. Last mod for the weekend, is to do something about the rear brakes. The discs look very lipped and the pads are just an mm or so away from the pad indicator. The 2 piston Brembo-made calipers hold the pads in with two pins, and that cross-shaped pad spring. First, you gently tap out the pins with a 6mm drift and a small hammer. The pins have this spring loaded ball thingo at the end, which clicks into this internal groove in the caliper. So once you tap them out of the groove, you can wiggle out the pins by hand. Yeah, those are toast. The pads are Toyota-branded. New pads are Brembo. They are rated to 650C, so should be okay for light trackday use, but reputedly they dust up pretty bad, so I may just keep them as track pads. We'll see. Once I pull out one pad, I use it to lever the caliper piston back. Then I put a new pad on that side as a placeholder, while I lever in the piston on the other side. If you don't put a new, thick pad in there, the piston on the other side will pop out as you push in the opposing piston. Pistons all pushed in, the caliper is unbolted and hung from a hook, so that the hose won't stretch The discs have these M6 threads, so that you can insert some M6 bolts and as you tighten them the discs will push away from the hub. Oh...make sure the handbrake is disengaged before you do this, for reasons which will become self evident. Because once teh disc is off, you can see that the handbrake mechanism is a drum arrangement.... ...that used the inside of the disc as a drum brake surface. The old discs were down to 26.8mm; min thickness is 26mm, so while there's some life left, we might as well swap them out. I actually don't like cross drilled discs as they're a bit more crack prone, and I notice that Lexus has fitted undrilled but slotted discs to the RCF and GSF, so I figure that's good enough for me. The new discs are DBA T2. That thing with the slot is a rubber plug that you swap over from the old discs; removing the plug gives access to the handbrake adjuster mechanism. And then we hit the road to break in the new pads and discs. The objective of this is to 1) bake off the resins from manufacturing that are inside the pad and 2) lay a thin layer of brake pad friction material onto the disc. To do this, you just find an industrial road where you can accelerate to 80 and brake hard down to 10km/h about 15 times in succession (without stopping). And then hit the freeway for about 5-10mins of cooling down, and that's that.
-
The ISF was in great condition when I got it; the two previous owners had really taken good care of it. But I figured my usual detailing ritual for the new car wouldn't hurt. I wanted to apply the Gyeon MOHs glass coating, so I'd have to perform a paint correction anyway. So here goes. First step is to give the car a good wash. Then I use Iron-X to remove any iron deposits stuck to the paint. It turns out that quite a lot of the roughness of unpolished paint is due to iron particles baked on good. So you spritz this stuff on, and there's an immediate reaction, and the car starts to stink, and any iron deposits turn purple. Not too much on the paint (since the car was probably detailed prior to sale), but plenty on the wheels, due to the iron particles in brake dust. Then give the car a good rinse, and wash it again to get all the purple stuff off. Next step is to clay, so you spritz each panel with quick detailer, and glide the claybar across the paint. You'll hear it as the claybar picks up little nibs and bits stuck onto the paint. This is after doing half the bonnet; not too bad, the paint is reasonably clean, but we did find some dirt. Then dry off the quick detailer with a microfibre, and the paint will be really smooth and silky to the touch. At this point, the paint is clean, but we haven't really begun the paint correction yet. There are a few spots with some light scratches... So for these spots, I use the Menzerna Heavy Cut. You don't use very much...so just a couple of dabs on a coarse/cut buffing pad Dab the pad onto the panel to distribute the polish. Then set the buffer to its slowest setting, and spread the polish across the panel, until it's a uniform haze. Then when it's all uniform, turn up the speed to almost full, and buff the panel until the haze starts to clear. Wipe off any residue with a microfibre, and the scratch is gone. There were only a couple of spots that needed this treatment, so this first step of paint correction didn't take long. If the paint was really swirly and matte, then I might have had to buff the whole car with Heavy Cut, but that's not the case here. Next step is to buff the car all over with Menzerna Medium Cut, which is applied with a medium coarse/polishing pad. Because the foam is finer, it can clog, so I brush off the excess dried up polish every few panels with a stiff brush. First thing is to mask off the sunroof and some of the trim. I find that getting polish on the headlights, glass or taillights and badges isn't a big deal, but it does leave a white stain on rubbers and some grained black plastic trim, so I mask off those areas beforehand. As before, you don't need much of the Medium Cut. This will do a fender, or a door. Dab the pad all over to distribute the polish... Lowest-speed on the buffer to spread it in a thin haze... ...then turn up the speed to almost full, and buff in slow passes until the polish starts to go clear. Then wipe with a microfibre...and I find this step of the detailing to be quite rewarding, because the medium cut removes swirls, and knocks off all the sharp edges to the paint, so it leaves it with a really mellow shine, like the paint is still wet. After buffing the whole car with Medium Cut, it looks great, but the next step will add more gloss and shine. We follow the same process as with the Medium Cut...and the Super Finish does noticeably add a deeper gloss. So at this point, we have corrected the paint to remove swirls and scratches, and we've finished it with a finer polish to leave a nice gloss. But as a final step, we need to seal in the gloss. I would at this point, embark on the 3-day long process of applying Gyeon MOHs glass coating, but the catch is that for those 3 days, you're not allowed to drive the car. So I figure I'll leave that for later, and seal the paint with a conventional wax instead. Later, all I need to do is to wipe down the paint with isopropyl alcohol, and start applhing the MOHs, since the paint correction is already done (and is permanent). The Concours Driftwax is easy to apply...it goes on like a greasy film, and you immediately wipe it off, one panel at a time. And we're done! All swirls and fine scratches gone :) Now, if double-demerits would go away, then maybe I can go out and drive the thing :)
-
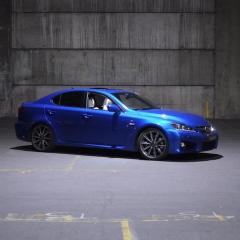
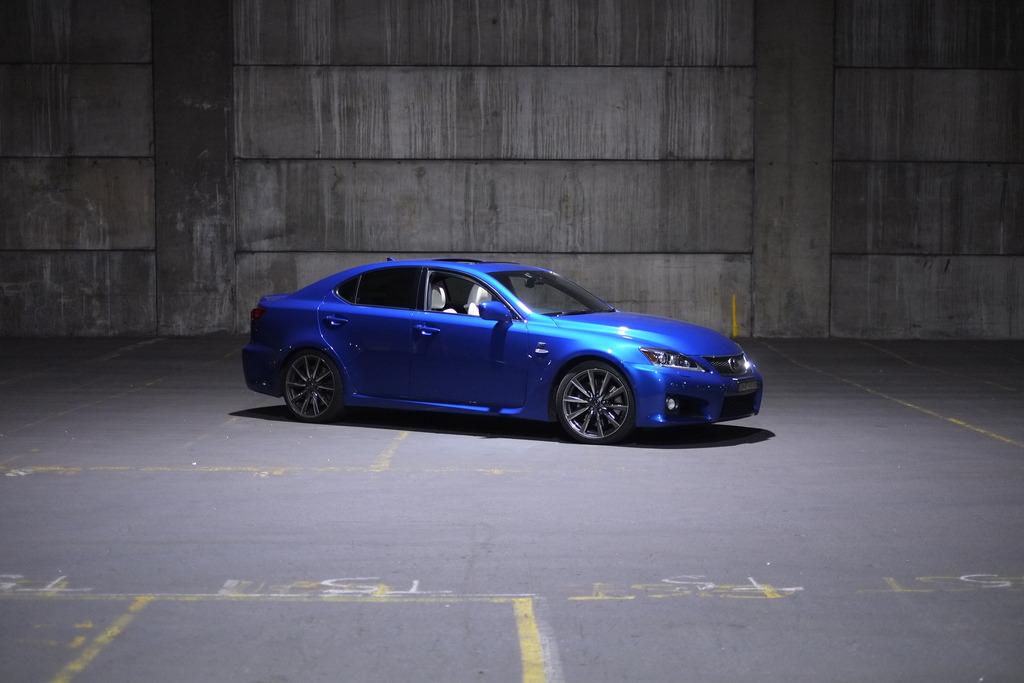
Hi everyone! Long time lurker, and first time poster. I keep a maintenance diary on another forum, so I thought it would be fun to share it here. It's written for a non-ISF owning audience, so please accept my apologies if it's all stuff you already know :) So...the FD is for sale and I have had an IS-F for about a month now. It might seem like a strange swap, but it's a car I've always wanted, and as the prices for them have come down quite a bit recently, it seemed the right time to get into one. So here she is, a totally stock 2011 model with 49,000km and I'm the third owner. The model history of the IS-F is a little confusing. When it came out in 2008, every car magazine in the world seemed to do a comparison test against the BMW M3 and the AMG C63. And the general vibe was that it was a good car, but the German pair were preferable. Criticisms of the IS-F mainly centered around the rough ride and less polished handling compared to its rivals. And in terms of speed, it was roughly in between the Beemer and the Benz. That was it for a while, and the IS-F wouldn't reappear in car magazines again until 2012, when it was said to have received a big update, and finally, some magazines would say that the IS-F had caught up. That tends to make the 2012 and later models the desirable ones (and the market prices reflect that) but the reality is a little more complicated. For 2008 and 2009, the IS-F was unchanged. But in 2010, the e-diff was replaced by a torsen LSD, which Lexus said at the time, was worth a 2 second a lap improvement around Fuji Circuit. The e-diff was really a very weak clutch-type LSD...well, sort of. It was a regular open diff, but with some conical springs preloading the side gears; this had the effect of creating a little internal friction, enough to impart a very, very mild lsd effect. Most of the work was done by braking the inside wheel, which sent the torque to the outside tyre. So the 2010 model having a proper LSD is a desirable for this reason alone. It still has the very firm suspension, but if you were going to replace them with coilovers anyway, that didn't matter. In 2011, there was quite a big update, revolving mostly around the suspension. The Tokico shocks were firmed up, the springs were softened, and the sway bars were made thicker. The front suspension scored new lower arms and uprights to change the geometry, and the rear suspension scored stiffer bushes and more negative camber. The ride was now softer and the handling more compliant. The power steering (always electric since 2008) got a new ecu that made the steering lighter. And the other change was the instrument cluster, which replaced the conventional speedo/tach combo with an LF-A esque cluster with a huge central tach and a tiny little speedo next to it. And then in 2012, the Tokico shocks were replaced by Sachs units which promised a better low speed ride, and the BBS-made "Katana" wheels were replaced by more conventional looking BBS spoked wheels. There's a big price jump between the older models and the 2012-14 models, but if you had to choose an older one...the 2011 model seemed a good compromise to me. As luck would have it, the very first car I looked at, on the very first week of looking...was a blue MY11. It was immaculate, and the price was right, so I didn't have any qualms about buying that first car. Now, the quirk about the 2011 models, is that quite a few of them were optioned with the Alpine White leather interior... ...not my first choice, but the car's previous owners had done a good job of keeping the seats clean. But the first thing I wanted to detail, was to get the seats as clean as possible, and then seal them. And here and there, there was a bit of ingrained dirt... ...that would have to be dealt with first. First step is to give the seats a good scrub with Gyeon Leather Cleaner, which I spritz onto the leather and then work with a soft brush The cleaner lathers up a little, and the foam comes off grey and dirty. And it does work...here and there I'd miss a spot and it would be quite obvious. After the leather's all nice and clean, the next step is to apply Gyeon Leather Coat, which repels water and dirt, so it should help keep the seats cleaner for longer. The end result was pretty good, all the ingrained dirt was gone And the Gyeon Coat leaves the leather with a nice matte finish. It worked a treat on the steering wheel, which was a bit shiny from one in places. But overall the car's in really good condition. The kickpanels and scuff plates are all unscuffed, and still had the protective plastic sticker on them (which I've since removed) And the body is pretty much unmarked, and not much in the way of swirls either. And what's it like to drive? Well initially it seems a little too tame, and doesn't seem like a monster straining at the leash at all. Driving normally, it's very quiet, there's very little exterior noise that makes it into the cabin...the gearbox changes gear imperceptibly, and well...it doesn't feel all that different to my wife's IS250. A bit firmer for sure, and the steering is heavier, but it's mostly the same experience. And grunt-wise...if you were just driving normally, you'd think that it was about the same as my old GS430. But geez...when you get into it, the character totally changes and it's got a ton of firepower. After a good drive on a winding road, it makes an interesting comparison against the FD. The FD is a lot purer, and it's easy to jump in and immediately feel comfortable in going fast. I don't get the same immediate confidence in the ISF; it feels big and heavy, and while it has stacks of mid corner grip and you can really lean on it, you just don't get the same level of feedback as you tip it into the corner. Power-wise, it's definitely more than the FD and coming out of 3rd gear corners, it often flashes the traction control light at you (when I didn't think it would step out...). So I'm not quite at the point where I feel as confident in it as I did with the RX-7. However it does have some party tricks up its sleeve, and one of them is exiting every side street and tight intersection sideways, and just as the rears hook up and find traction the massive induction bellow kicks in and off you go. That will probably take some time before it gets old. Now that the interior is where I want it, the next step is to go full-retard on paint correction on the outside :)